My good friend Andy and I are slowly creeping closer to our first games of Necromunda and also to some Kill Team. Well we would have been if it wasn’t for COVID!
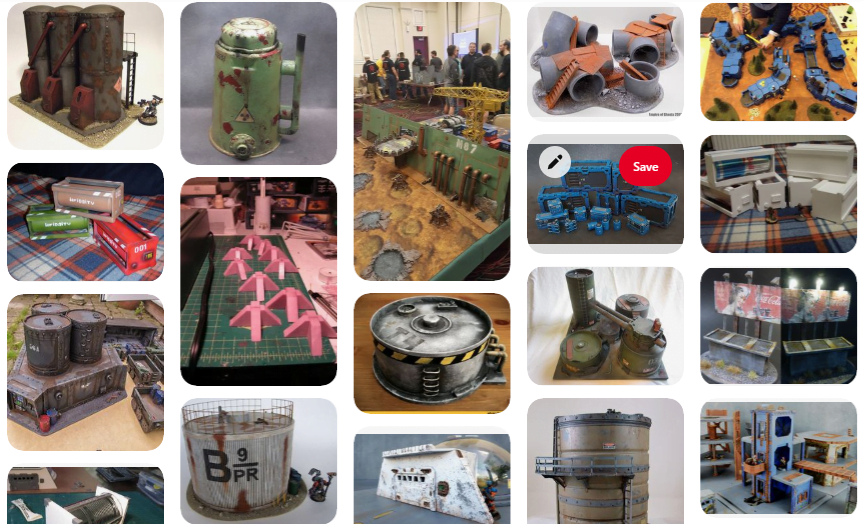
From the 1990’s release of Necromunda, one of the best tabletop games I’ve played, the one-component that made it stand out was the gorgeous terrain. Not only did the expansive Necromunda terrain block line of sight in every direction, but the height and density really impacted on gameplay tactics.
I have recently slapped some paint on my Goliath boys ready for their new underhive home.


Any terrain I make I should aim to tie the theme in to my Goliath gang. Not that that would be hard – dirty, low-tech and covered in metal… thats the default Necromunda terrain style isn’t it?
So despite having some of the original 1990’s Necromunda terrain and bulkheads, Andy and myself don’t have a lot of solid custom of line-of-sight (LoS) blocking terrain that we can just throw down on a table.
So, time to build some DIY terrain!
Now, with my historic war-gaming I’m approaching my terrain slightly different. For the terrain I want to build for Necromunda and Kill-Team, I want it to adhere the following philosophy:
- Storage is key!
- Multi-purpose
- No-coke-cans!
- Quick(ish)
- Cheap Affordable
Now that list is also in a rough order of importance too. Hopefully all the pieces I design (in my head) should fit at least the majority of these points.
Storing the DIY terrain is key
Like most of us, storing terrain and units is a real pain. Although I’m blessed enough to have a relatively good sized room for war-gaming, storage is still key. The space is used for both WW2 and futuristic war-games, board games, card games, computer games, painting, reading and programming. So packing things away and storing them is key.
One thing I want to make sure is that any terrain is space-efficient, no large brimmed bases or obscure jutting out pieces. Terrain that tessellates well, fits inside other pieces of collapses into small pieces is the goal!

Storing DIY terrain efficiently probably boils down to:
- Work out where the terrain is going to be stored,
- Work out the max dimensions,
- Build inwards from there,
- Simplistic shapes,
- Tessellate terrain inside other pieces,
- Small / no terrain lip or board around the outside of the piece
DIY terrain that is multi-purpose
What I don’t mean by this is I hope that I can use my terrain for both Necromunda and the beaches of Normandy for Battleground.
What I mean is that hopefully each sizeable piece of terrain (not small scatter pieces) can be used on, quite literally, multiple levels.
A simple solid large cube building with a pitched roof blocks line-of-sight (LoS), but offers hardly any other interaction with the battlefield.
Now that same simple cube building with a flat roof and a ladder or external stairs to the roof, offers a secondary surface.
Further still, make the corner of the building an enclosed ‘balcony’ like area; now the building blocks LoS, has a large roof area and a possible sniper point.

Multi-purpose DIY terrain probably will involve:
- Ground and at least one additional level,
- Internal angles / indentations to create negative space,
- Ladders!
- Blocking line-of-sight for either ground or raised units,
No coke cans!
I love a reason to drink Coke Cola to be honest, but what this point means is that I don’t want the battlefield to look like its covered in terrain made of cans and Styrofoam.
It *can* be made of those things, I just don’t want it to *look* like its those things. I don’t want someone to be able to glance at a piece from across the room and immediately be able to identify the items used to build it. If that makes sense?

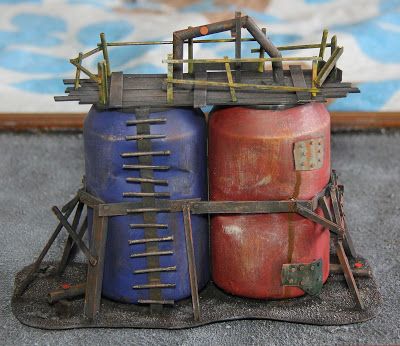
Things I want to avoid / things that I find really obvious on the battlefield:
- Drink cans. The height and rounded neck/base of a standard drinks is very distinct,
- Food cans. The typical ‘baked-bean’ can has horizontal ridges around the centre, making it very distinguishable,
- Pringles tubes. Again, very noticeable,
- Styrofoam packaging. These tend to have very rounded corners, usually on the outer edges. Very noticeable,
- Drinking straws. The corrugated bend at the end, to produce a 90° angle is very obvious,
FWIW; all of these items will be used, I just hope to hide their identities from the casual glance.
Terrain that is quick(ish) to build
The time I’d like to spend gaming or building terrain is seriously more significant than the actual time I get to do those things. That’s just life, unfortunately.
For that reason, the terrain I want to design and build must be pretty quick (and therefore more simplistic) to make.
Now that doesn’t mean I can’t order custom MDF parts from eBay etc, those can spends days or weeks getting to me while I do other non-gamey things.

Affordable DIY terrain
Like 95%* of people out there, dropping large quantities of cash on terrain isn’t a possibility. So hopefully I’ll be able to use lots of recycling and old items, as well as cheaper building products. Also, re-using items is so much better than chucking them in the bin and buying more stuff.
This does obviously work somewhat in opposition to the ‘quick’ bit of the philosophy. It’ll be a balance.
(* completely made up stat)
Stay tuned
As I hopefully get some Kill Team and Necromunda terrain built up, I’ll create links and a gallery and paste it below.
Stay tuned for future DIY terrain posts or head over to my Goliath painting page 🙂 Thanks for reading